Hand Position:
- See the Fundamental Oboe Finger Skills page for much more detailed information.
- Start with balance points - right thumb and left first finger.
- The right thumb should be at a natural angle, closer to flat to the thumbrest than the oboe.
- The thumbrest sits between the joint and thumbnail. Just past the joint is fine, but NEVER on or inside of the joint.
- The fourth finger and the left thumb are NOT balance points.
- Notice the oboe stays up because of these balance points and AVOID feeling like you're squeezing it.
- Fingers should be curved, including third fingers and pinkies.
- Keep hand angles low.
- The bottom of the hand should be as close to the oboe as the top.
- The first finger may feel like it's reaching very slightly up.
- The most active fingers on the oboe will be the pinkies. Do NOT set the hands at an angle too high to facilitate the easy reach of all pinky keys.
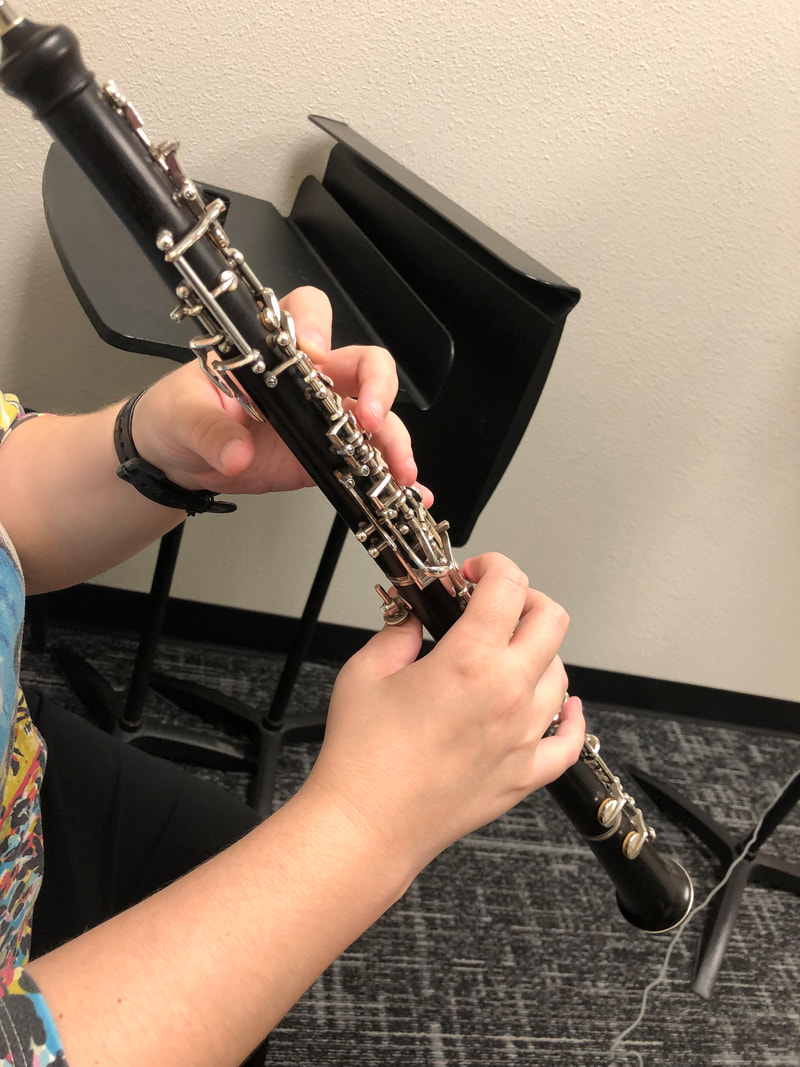
- Beware habits like trying to stay in playing position with one hand (balance points require two) or fingering with the oboe straight and sitting on a leg, which force the hands to undesirable angles and to excess tension, dangerous habits which can really tend to stick in beginners.
- The distance between the second and third fingers is large, and can cause students to try to raise the hand to avoid the required stretch.
- Being able to spread those fingers while keeping them curved and relaxed is an essential skill that must be built.
- It may help to try making 'Spock hands' (live long and prosper) and then waving them.
- Being able to spread those fingers while keeping them curved and relaxed is an essential skill that must be built.
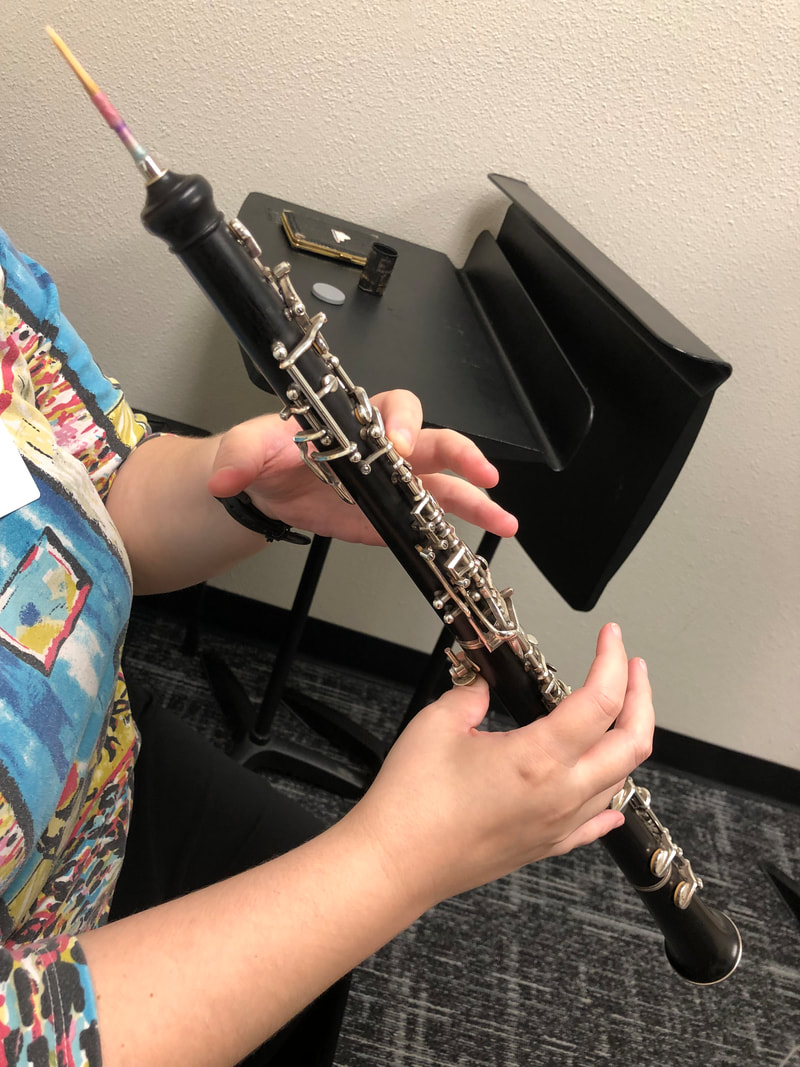
Balance points
|

Hand position
|
Left thumb may gently touch under the octave key or float nearby
|
